Incorrect size after export to Illustrator/Glowforge

In Sketchup each side of my triangle is 5". Upon export to SVG with Fabber each side is 6.67" when I open the SVG in Illustrator. When I open the same SVG with Glowforge each side appears to be about 5.5".
I set Fabber “export to” to Illustrator and tool diameter to 0.001 for the Glowforge. Units are set to Decimal Inches in Sketchup. I’m not sure what I’m doing wrong.

Here are my files.
Triangle_Solid Triangle_Solid.skp (65.1 KB)

I also noticed some dimension inaccuracies (about 2.5% short) when going into Aspire. I did not see these in previous versions.

The Sketchup Camera was in Perspective not Parallel Projection and was not in Top View. So after changing that it worked!

@carrie When importing from SketchUp to Aspire/Vcarve you don’t need to change the perspective in SketchUp at all. You also need to make sure that you have the settings correct. If you click the gear icon on the GetFabber window it’ll bring up this:

image

In the drop down you can pick which program you’re exporting for. If you have it set to VCarve it should be dead accurate for VCarve. If you’re using that setting and not getting perfect accuracy let me know. I tested your model going from SketchUp>Vcarve and it’s spot on. @sehast If you’re seeing imports that are off can you post them?

As far as going to Illustrator I tested your model (with Illustrator set) and I am seeing a scale issue. I’ll dig further and see what’s going on. I’m curious if Illustrator did an update, or if it’s something that we did.

@Eric I noticed a similar scaling issue working with the Glowforge last night, but I wasn’t using illustrator in my workflow. I didn’t have calipers on me but I’d guess the cuts were 1/4" off. Exporting my SketchUp file to .svg I was using the following settings:

I’m still pretty new to the SketchUp > Glowforge workflow so this could be operator error. I’m going to try again today and see if I can replicate the issue.

Post your SketchUp file and I can test it.

What you should do for Glowforge is this:

Go to the settings gear in Fabber and select “custom DPI” set that to 96 and try it. It should be perfectly accurate after you do that.

The confusing thing about this is that if you open that same file in Illustrator it will be wrong. Every time you export you need to make sure that you’re exporting for the program you want to open it in.

This means that if you want to open your Fabber SVG in Illustrator you export with the Illustrator setting on.

If you want to Glowforge (IE go right into the GF app) you have to set a custom DPI to 96.

2 posts were split to a new topic: SketchUp file not exporting to the right size

When I select export to Illustrator, Fabber sets the dpi to 96 which is correct for Glowforge but apparently incorrect for Illustrator.

You are correct that the perspective setting in Sketchup doesn’t seem to matter to Fabber however it does if you are exporting a DXF from Sketchup. Which I was able to export into Illustrator and save as an SVG that does work with Glowforge. Which was my previous workflow before Fabber.

The other frustrating issue with Glowforge is that in the Glowforge app objects appear larger than they cut out according to the rulers within the Glowforge app. So my 5" triangle side appears closer to 5-3/8" but cuts out at exactly 5". So I was not cutting some of my files from Fabber thinking they would come out incorrectly.

Anyway, now I have no problem going directly from Sketchup to Glowforge with Fabber. I am not very experienced with Illustrator so was finding my previous workflow stressful and tedious. So thank you Fabber!

Gotchya! So the real issue is with the Glowgorge giving you a size that’s essentially a bounding box that’s around the object you’re cutting… That’s unfortunately a limitation of the Glowforge app.

As long as you’re exporting using the settings I outline above for each program you intend to use you’ll be in good shape!

Triangle_Solid.skp (41.1 KB)

Yes, there is a lot of room for improvement with the Glowforge app. However, I am very happy to have a one step process to get my file from Sketchup to Glowforge. I don’t need to use Illustrator but I still don’t understand why the Fabber exports aren’t the correct size in Illustrator using the Illustrator setting.

Let me know if you figure out what is going on here.
Here are two separate SVG files one created from Sketchup exporting to DXF and saving as SVG in Illustrator. The other one created from Sketchup using Fabber with the Illustrator Setting. Both of these SVG files laser cut the same size and with correct dimensions to the original Sketchup file in Glowforge but are not the same size in Illustrator.
Triangle_Solid_DXF_to_SVG
Triangle_Solid

You’re running into one of the tricky things with SVGs, here’s a bit of a technical explanation that should help figure this out:

Let’s say you have an SVG that just has a simple square box in it. If you look at the SVG it just describes 4 lines. It shows the location of the lines, and the length of each line. The length of each line is in PIXELS, not MM in INCHES.

So a box that 5" square might have 4 lines that are 380px in length each.

Now here’s where things get tricky:

Adobe Illustrator, VCarve, Shaper Origin and Glowforge all can potentially expect different length lines… bear with me here…

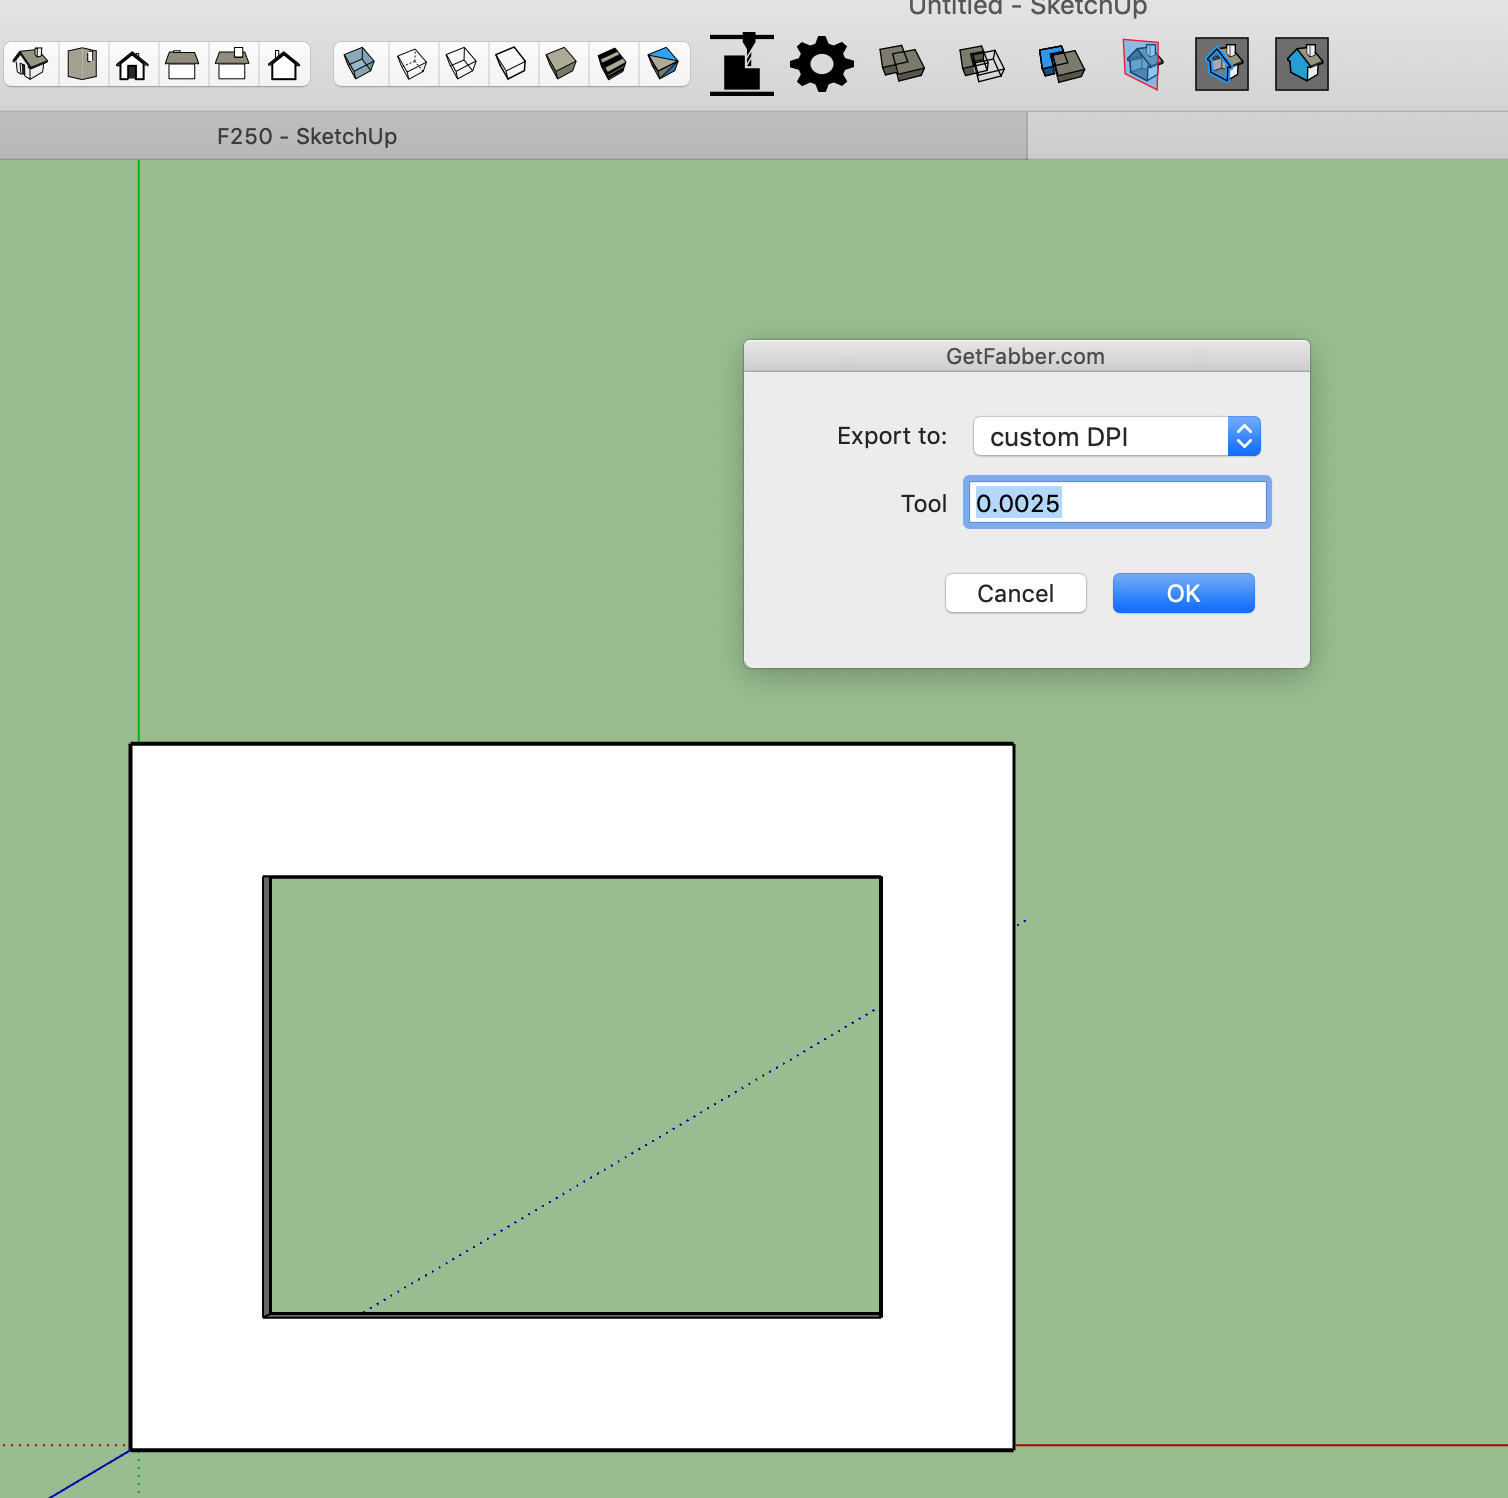
So you drew that 5" box in SketchUp and you want to open it in Glowforge. Glowforge may want a 76 DPI SVG, so that would mean that for your box to be 5" each line that makes it up would need to be 380px in length (380/5=76)

Now say you opened that same SVG in VCarve which likes 90 DPI files, that same box, which if you remember is 380 pixels on each side now comes a different size, despite you changing nothing in your original SketchUp model.

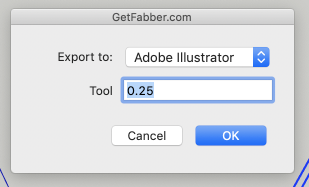
This is why in Fabber we have different drop downs for different programs. What these drop downs do is effectively set your exported SVG for the particular program you’re opening it up in. This means if you export it for Illustrator it likely won’t be the right size in Origin, Glowforge, etc.

Now in the particular case where you’re seeing the wrong size in Illustrator, that appears to be a bug on our end that we’ll look into. For now set a custom DPI to 72 and that should work for Illustrator.

A setting for 96 should work for Glowforge. Remember to change your DPI and re-export each time you open in a different program!

Does that all make sense?

Thank you for the detailed explanation and for the exact setting to export to Illustrator.

This might be better on a separate thread but I do have some feedback for Fabber. I can see that Fabber extracts the top face of an object but not nested objects or a series of objects bunched together. I’ve been laying out my objects in Sketchup to waste as little material as possible when cutting with Glowforge since the Glowforge interface doesn’t allow precise snapping or alignment of objects. Could you have a setting within Fabber to allow exporting of all linework on the ground plane within a component to be exported? It would also be nice to have layer support so lines on different layers could be exported in different colors that could be set to different cut or engrave settings within Glowforge. Just food for thought…

I think you’re asking two questions here… One is nesting.

Fabber doesn’t nest yet… Although we’ll be releasing that soon. What we do currently is lay all of the parts in a straight light. This is fine for a lot of CNC users as most of their CAM software has nesting. In the case of the Glowforge you have to manually do it. If you want to solve this problem today I recommend checking out www.deepnest.io. They have a free nesting software that can take our SVGs and pack them onto a sheet for you.

As for the layer thing: We do export to layers. Pockets, drills and cutouts are all on named layers that have the depth of cut on them. Open our SVG up in Illustrator and you’ll see.

Does that help?

1 Like